- Docs
- /
Migration to Azure - Azure VMs
25 Feb 2021 46113 views 0 minutes to read Contributors ![]()
Migration to Azure - Azure VMs
While migrating SQL Server database to SQL Server on Azure VMs, be sure to consider the versions of SQL Server that are supported and to address any prerequisites. This will help to ensure an efficient and successful migration.
Supported versions
SQL Server on Azure VMs supports migration of the following versions of SQL Server:
- SQL Server 2005
- SQL Server 2008 and SQL Server 2008 R2
- SQL Server 2012 and SQL Server 2012 SP1 CU2
- SQL Server 2014
- SQL Server 2016
- SQL Server 2017
Pre-migration
After verifying that your source environment is supported and ensuring that you have addressed any prerequisites, you are ready to start the Pre-migration stage. This part of the process involves conducting an inventory of the databases that you need to migrate, assessing those databases for potential migration issues or blockers, and then resolving any items you might have uncovered. For heterogenous migrations (such as Oracle to Azure Database for PostgreSQL), this stage also involves converting the schema(s) in the source database(s) to be compatible with the target environment. For homogenous migrations, such as SQL Server to SQL on Azure VMs, conversion of the source schema to work in the target environment is not required.
Discover
The goal of the Discover phase is to identify existing data sources and details about the features that are being used to get a better understanding of and plan for the migration. This process involves scanning the network to identify all your organization’s SQL instances together with the version and features in use.
To use the MAP Toolkit to perform an inventory scan, perform the following steps.
Steps
- Run the MAP Toolkit.
- Open the MAP Toolkit, and then on the left pane, select Database.
You will be on the following screen:
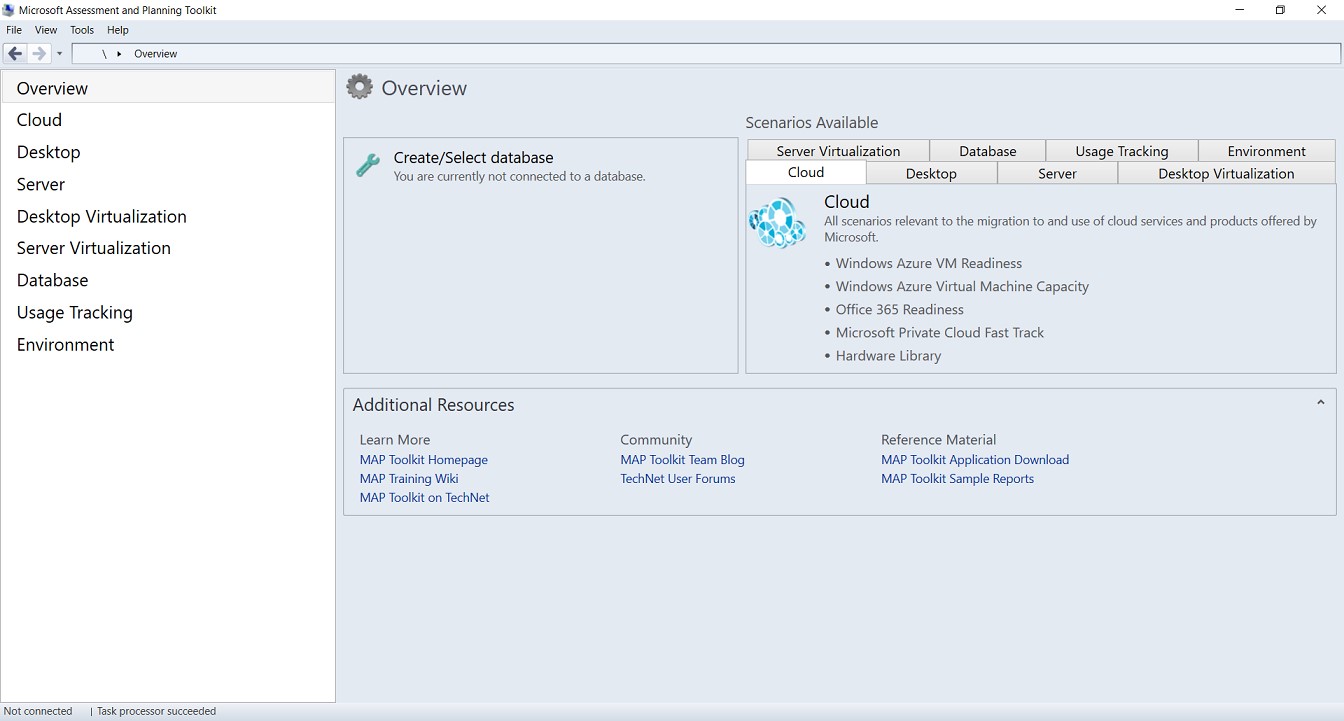
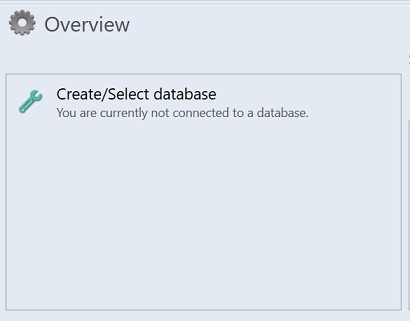
b. Select Create/Select database.
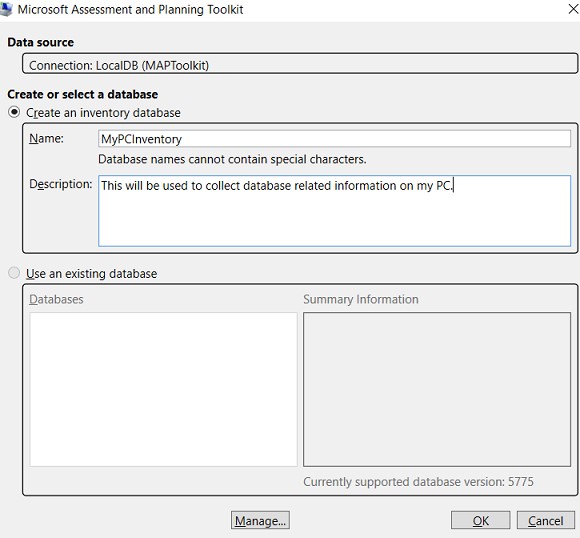
c. Ensure that Create an inventory database is selected, enter a name for the database, a brief description, and then select OK.
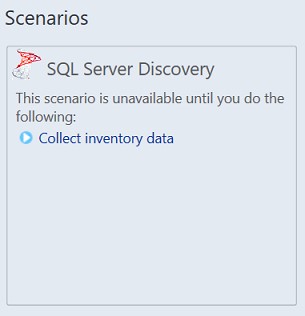
The next step is to collect data from the database created.
d. Select Collect inventory data.
e. In the Inventory and Assessment Wizard, select SQL Server and SQL Server with Database Details, and then select Next.
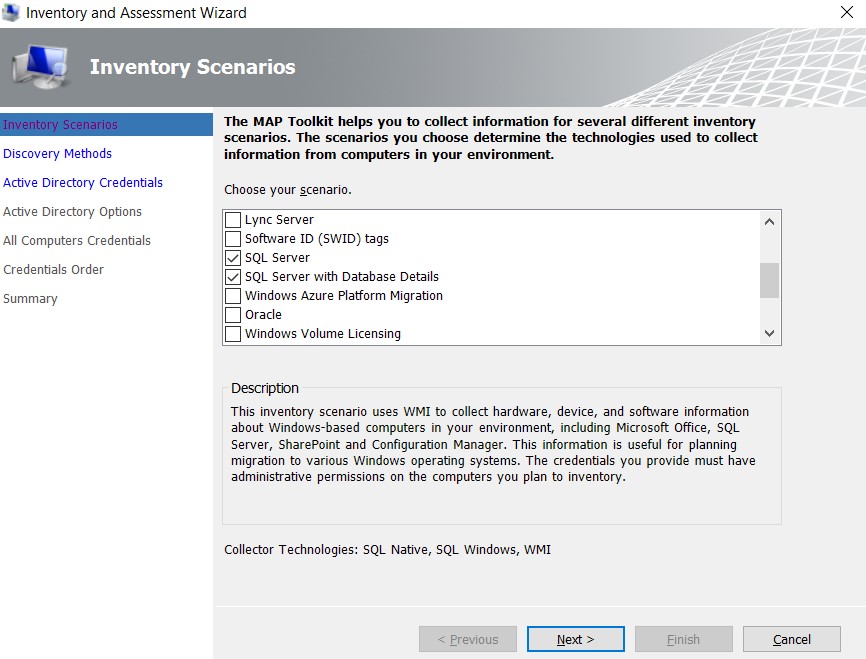
f. Select the best method option to search the computers on which Microsoft Products are hosted, and then select Next.
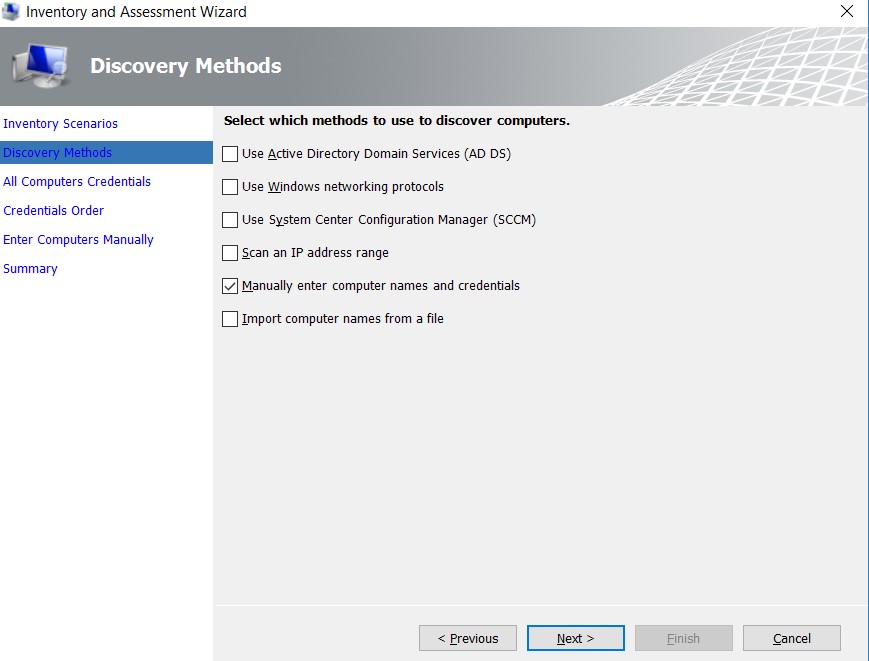
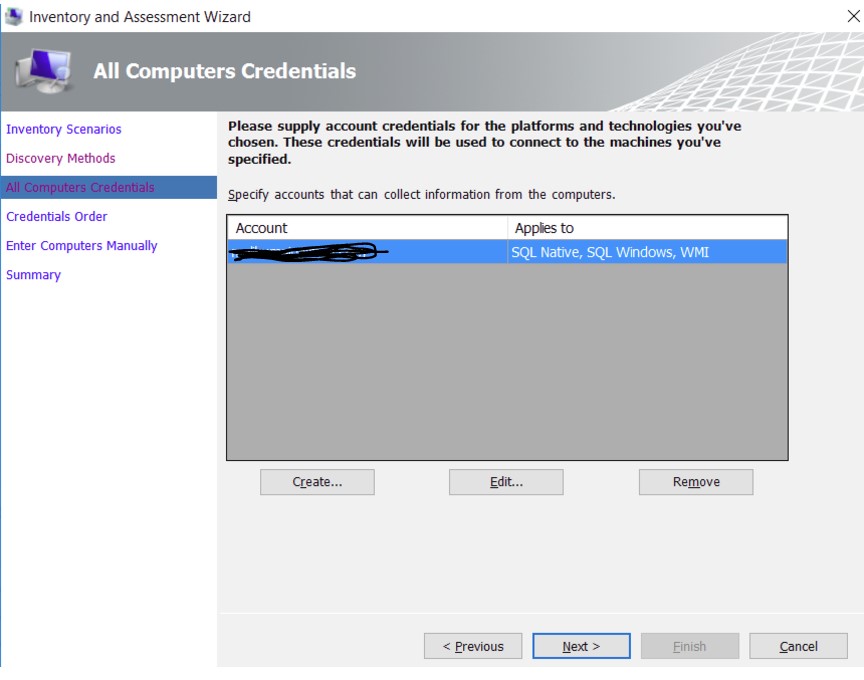
g. Enter credentials or create new credentials for the systems that you want to explore, and then select Next.
h. Set the order of the credentials, and then select Next.
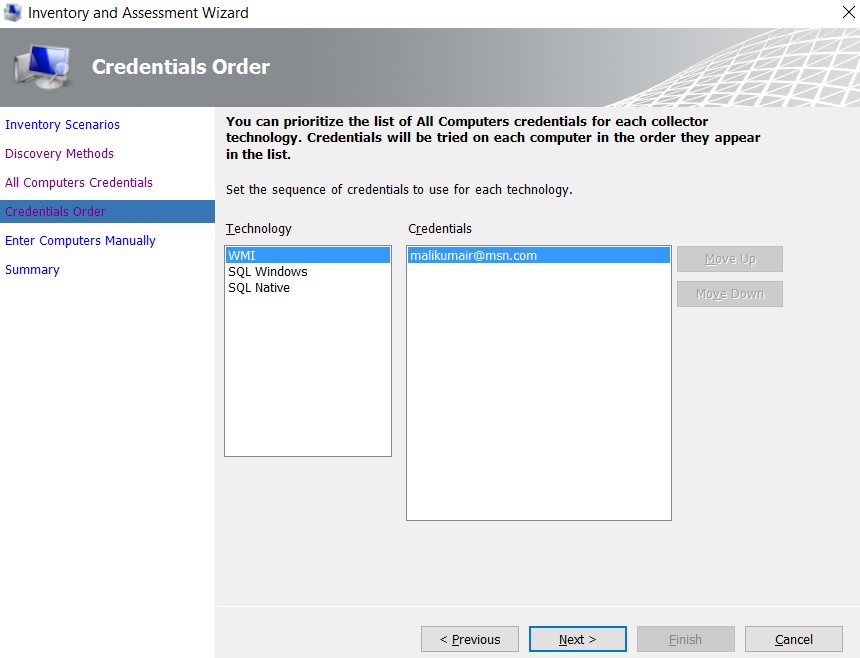
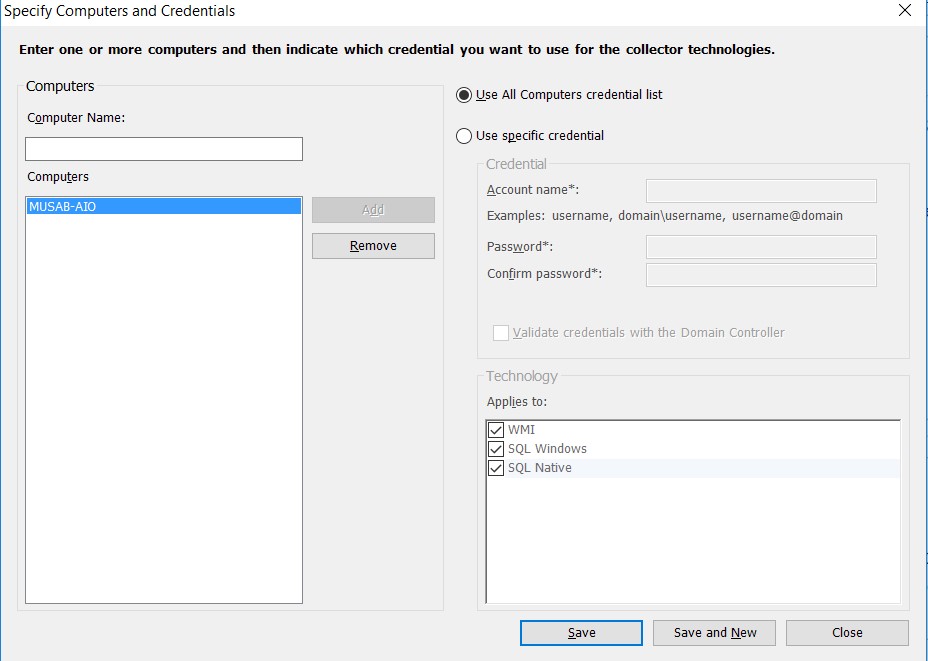
Now, you need to specify the credentials for each computer that you want to discover. You can use unique credentials for each computer/machine, or you can choose to use the All Computer Credentials list.
i. After setting up the credentials, select Save, and then select Next.
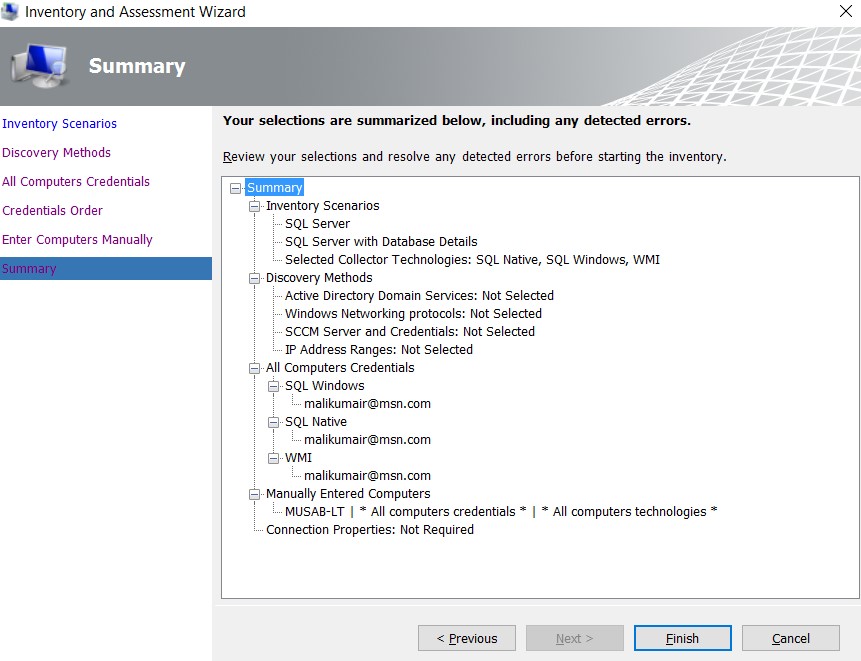
j. Verify your selection summary, and then select Finish.
k. Wait for a few minutes (depending on the number of databases) for the Data Collection summary report.
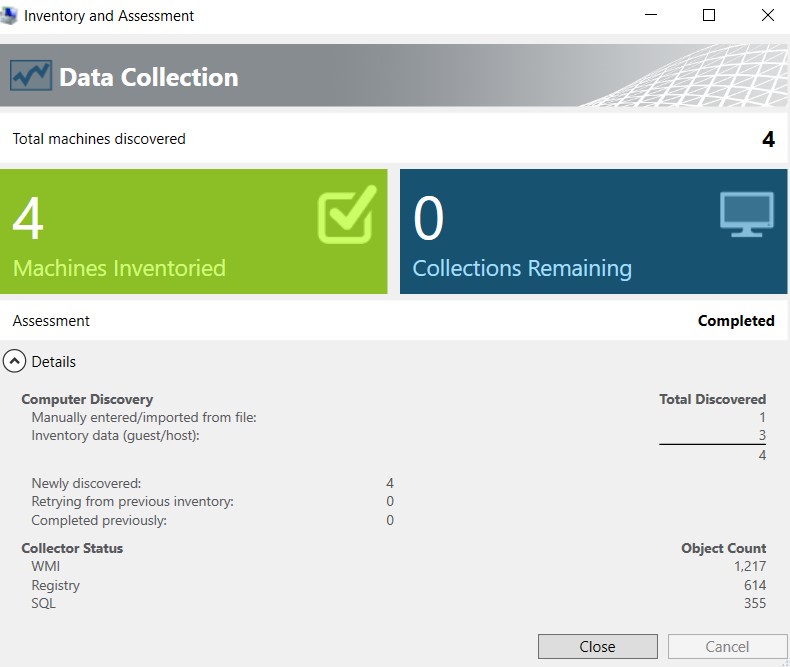
l. Select Close.
The Main window of the tool appears, showing a summary of the Database Discovery completed so far.
2. Generate a report.
On the top-right corner of the tool, an Options page appears, which you can use to generate report about the SQL Server Assessment and the Database Details.
a. Wait for a few minutes (depending on the number of databases) for the Data Collection summary report.

Assess
After identifying the data sources, the next step is to assess the on-premises SQL Server instance(s) migrating to a specific version of SQL Server on Azure VMs so that you understand the gaps between the source and target instances. Use the Data Migration Assistant (DMA) to assess your source database before migrating your SQL Server instance.
Steps
To use DMA to create an assessment, perform the following steps.
1. Create a new assessment project.
a. Launch DMA, select the New (+) icon, select the Assessment project type, specify a project name, select SQL Server as the source and target, and then select Create.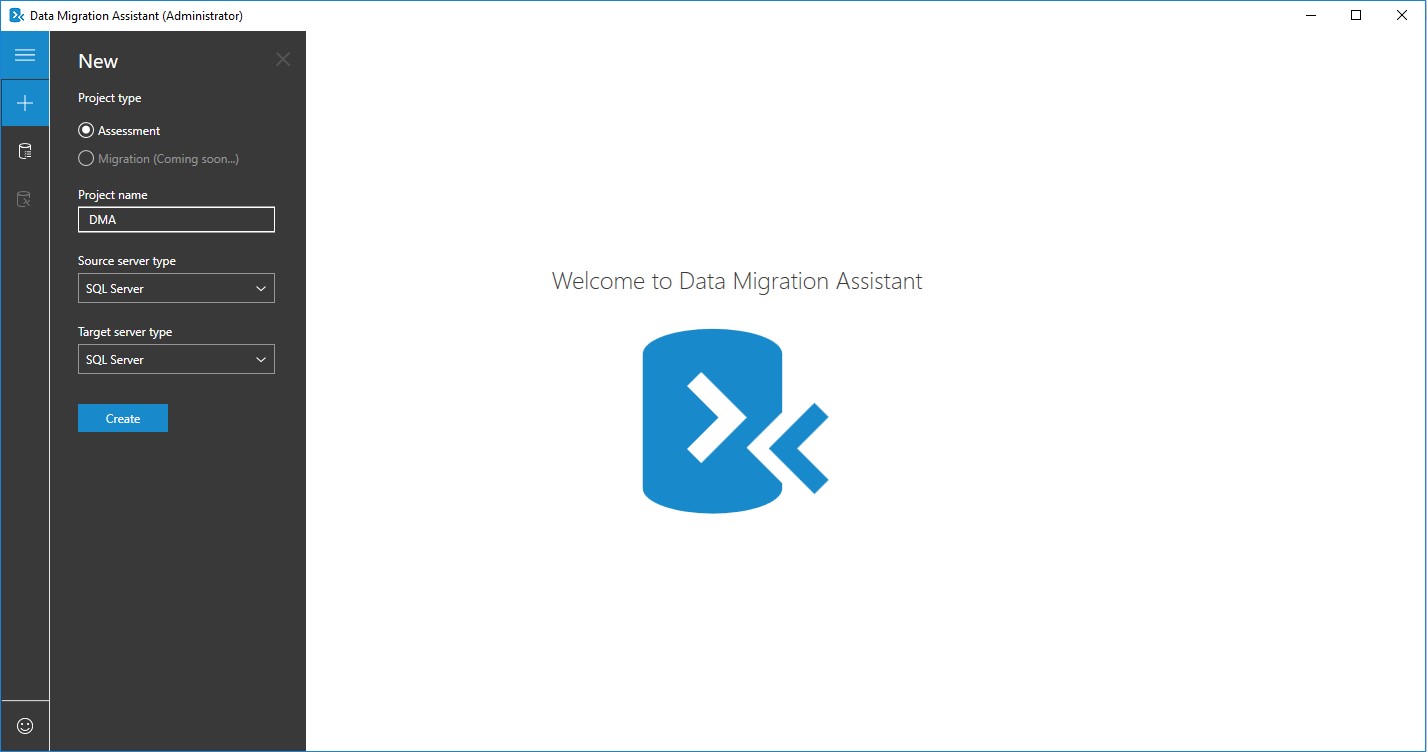
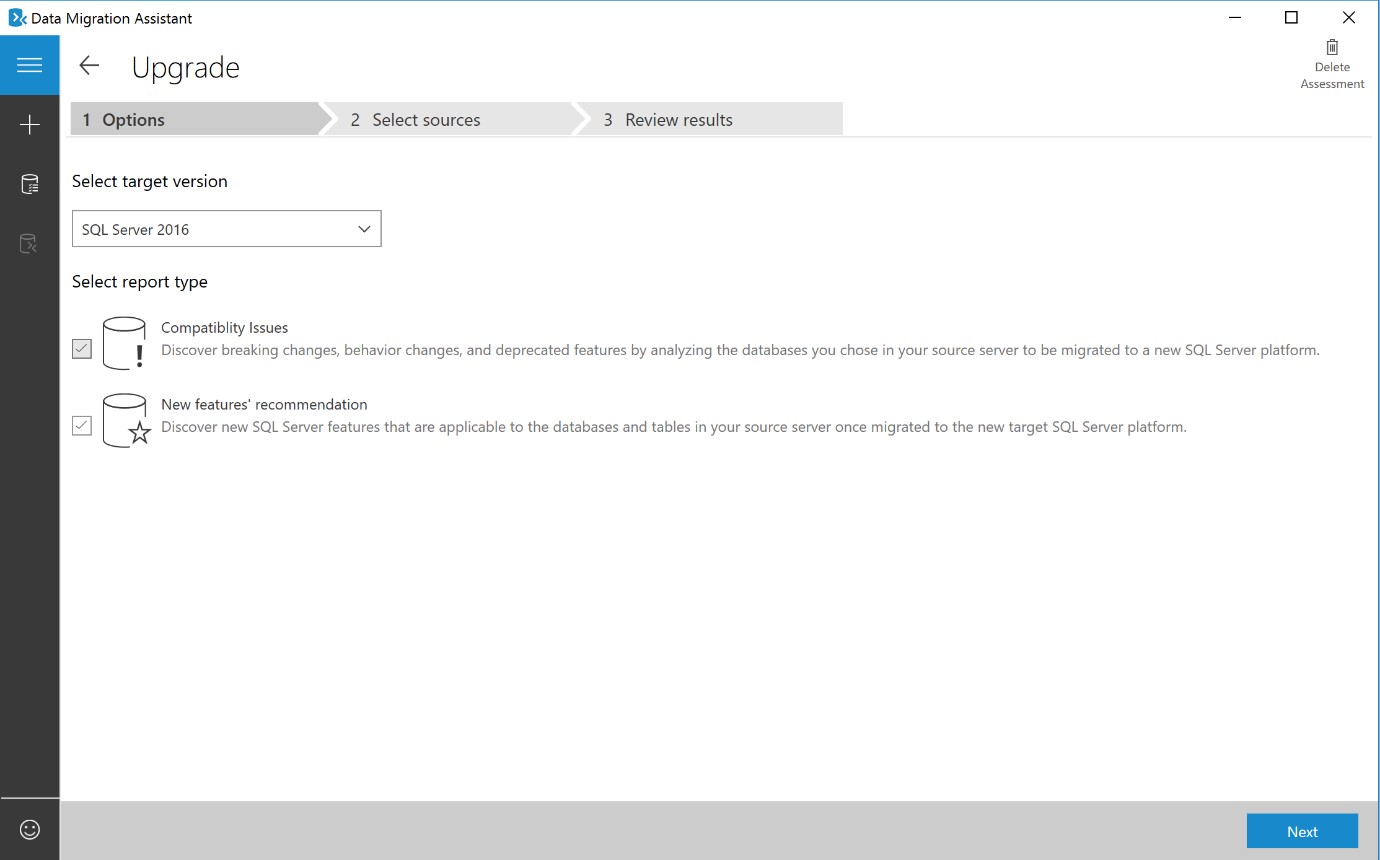
b. Select the target SQL Server version that you plan to migrate to and against which you need to run an assessment, select one or both of the assessment report types (Compatibility Issues and New features’ recommendation), and then select Next.
c. In the Connect to a server fly-out, specify the name of the SQL Server instance to connect to, specify the Authentication type and Connection properties, and then select Connect.
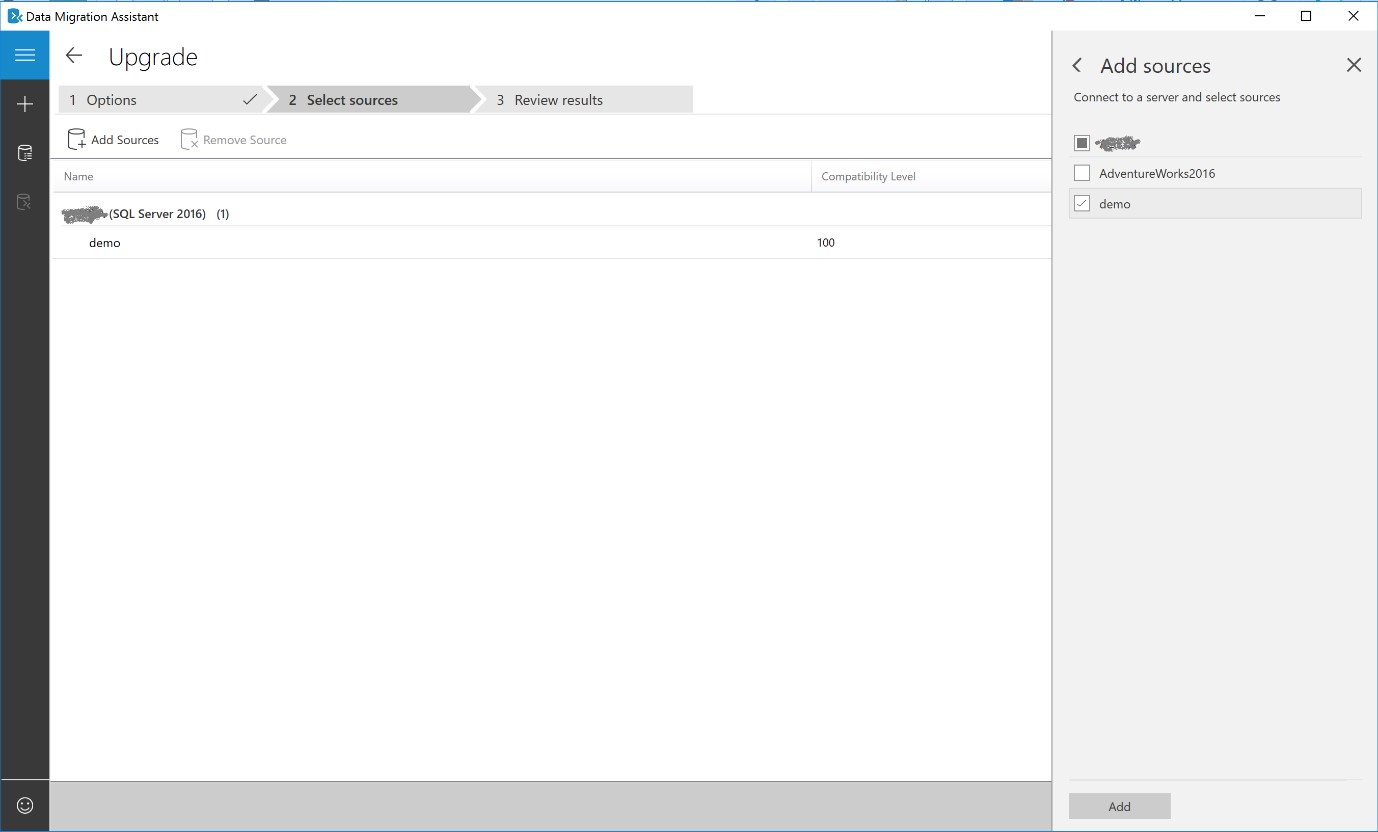
d. In the Add Sources fly-out, select the database(s) you that want to assess, and then select Add.
e. Select Start Assessment.
Now wait for the assessment results; the duration of the assessment depends on the number of databases added and the schema size of each database. Results will be displayed per database as soon as they are available.
f. Select the database that has completed assessment, and then switch between Compatibility issues and Feature recommendations by using the switcher.
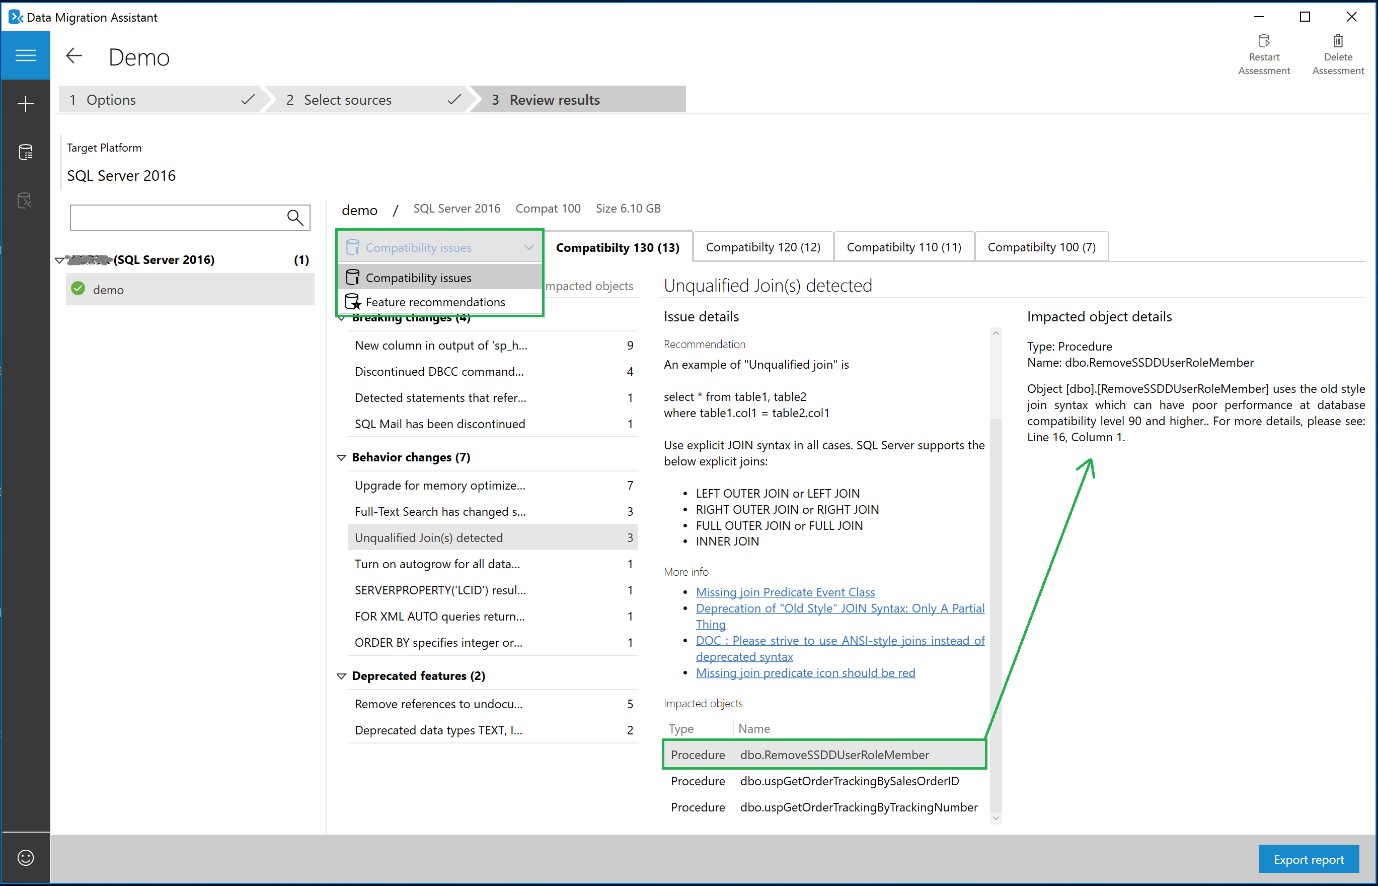
g. Review the compatibility issues by analyzing the impacted object and its details for every issue identified under Breaking changes, Behavior changes, and Deprecated features.
h. Review feature recommendations across the Performance, Storage, and Security areas.
Feature recommendations cover a variety of features such as In-Memory OLTP and Columnstore, Stretch Database, Always Encrypted (AE), Dynamic Data Masking (DDM), and Transparent Data Encryption (TDE).
1. Review the assessment results.
a. After all database assessments are complete, select Export report to export the results to either a JSON or CSV file for analyzing the data at your own convenience.
Migration
After you have the necessary prerequisites in place and have completed the tasks associated with the Pre-migration phase, you are ready to perform the actual migration.
There are several methods for migrating a SQL Server database to an instance of SQL Server on Azure Virtual Machines (Azure VMs).
Overview of migration methods
The list below identifies the primary methods for migrating from SQL Server to SQL Server on Azure VMs.
- Use the Data Migration Assistant (DMA) to migrate the schema and data into an Azure VM.
- Perform an on-premises backup using compression, and then manually copy the backup file into an Azure VM.
- Perform a backup to URL, and then restore into an Azure VM from the URL.
- Detach and copy the data and log files to Azure Blob storage, and then attach to an Azure VM from the URL.
- Convert an on-premises VM to Hyper-V VHDs, upload to Azure Blob storage, and then deploy a new Azure VM using the uploaded VHD.
- Ship a hard drive using Windows Import/Export Service.
- Use the Add Azure Replica Wizard.
- Use SQL Server transactional replication.
A couple of key points to consider when reviewing the migration methods to determine the best option for your business scenario:
- For optimum data transfer performance, migrate database files into the SQL Server on Azure VM instance using a compressed backup file.
- To minimize downtime during the database migration process, use either the AlwaysOn option or the transactional replication option.
Migrate schema and data
After assessing your databases, the next step is to begin the process of migrating the schema and database by using DMA.
Steps
To use DMA to create a migration project, perform the following steps.
1. Create a New Migration project
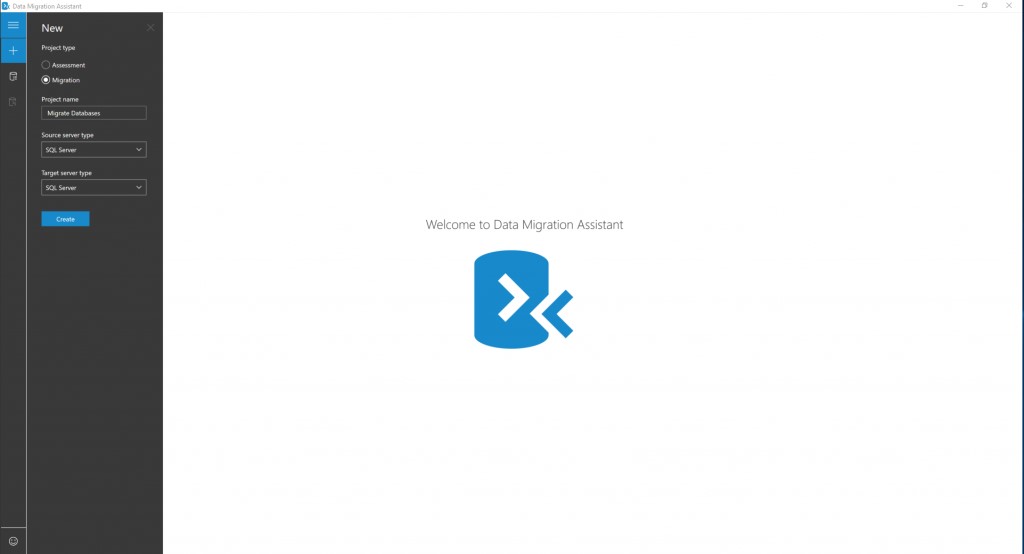
a. Select the New icon, select the Migration project type, select SQL Server as source and target types, and then select Create.
b. Provide source and target SQL server conenction details, and then select Next.
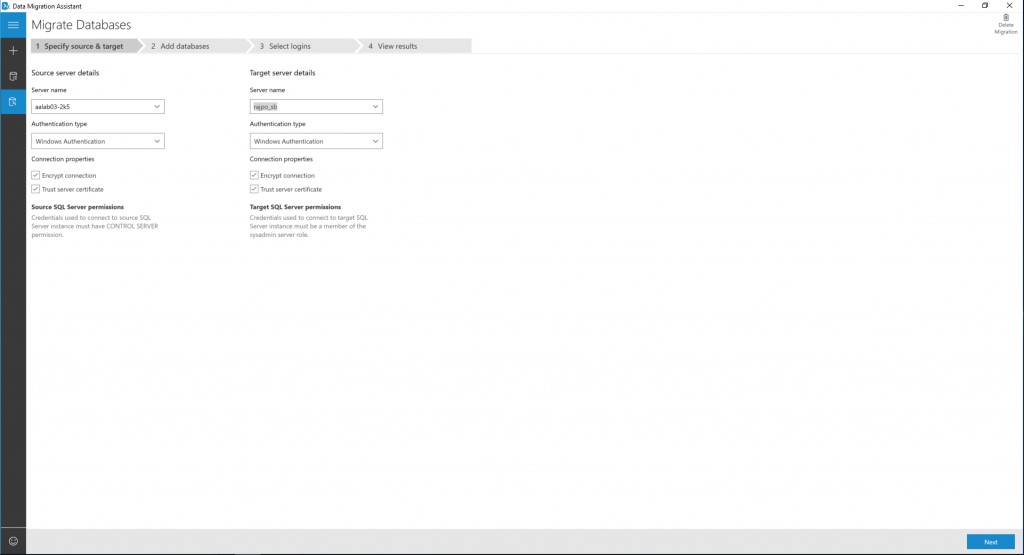
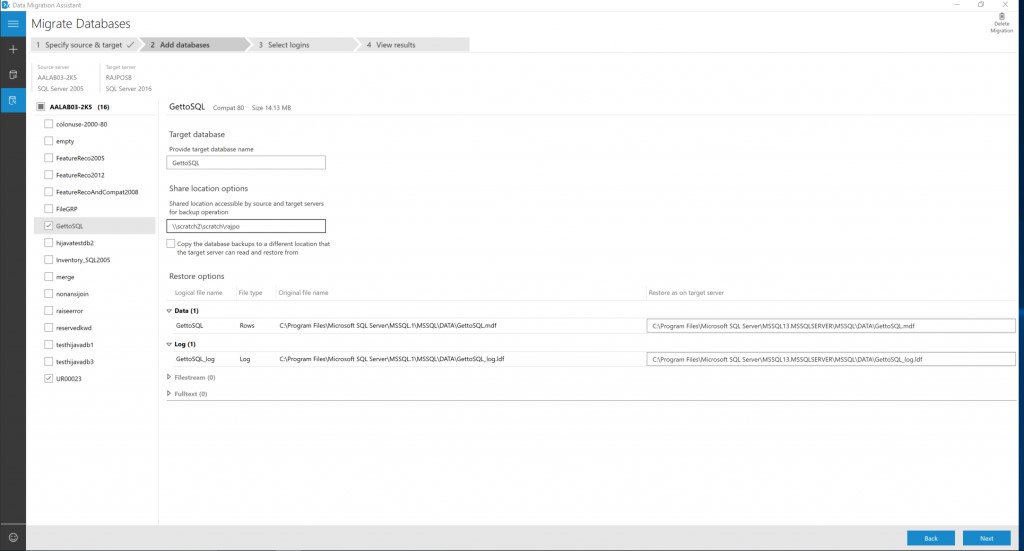
c. Select databases from the source to migrate, and then specify the Shared location accessible by source and target SQL servers for backup operation.
Note: Be sure that the service account running the source SQL Server instance has write privileges on the shared location and that the target SQL Server service account has read privileges on the shared location.
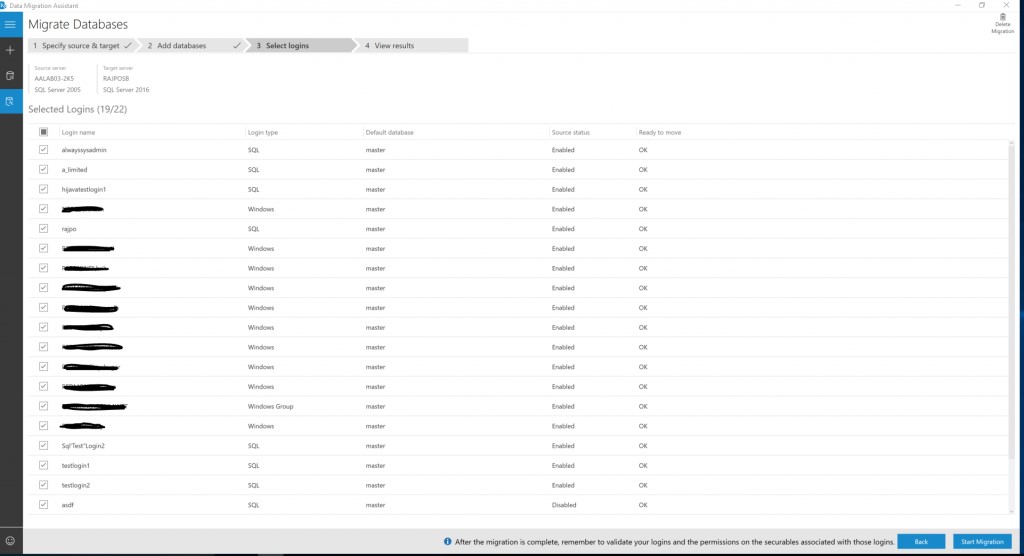
d. Select Next, select the logins that you want to migrate, and then select Start Migration.
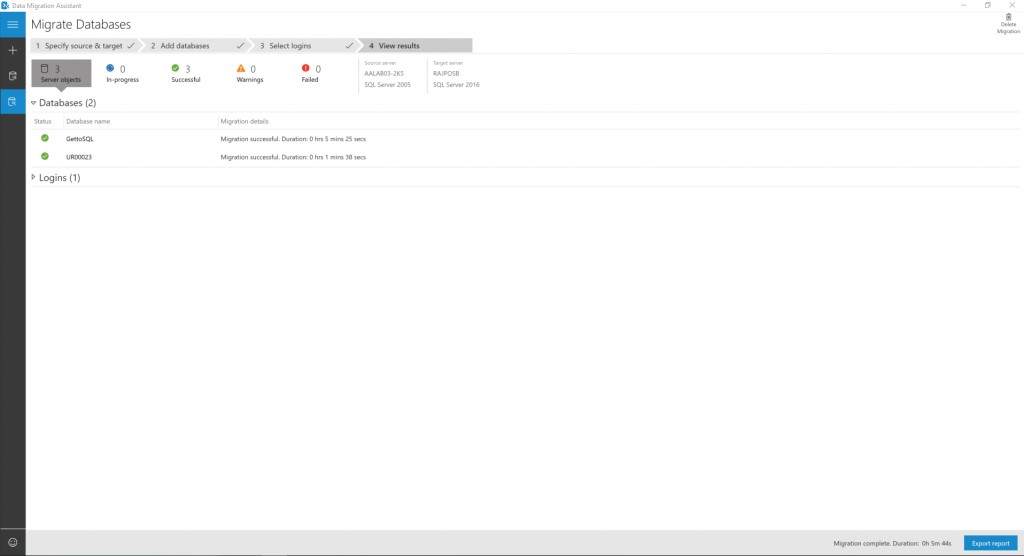
e. Now, monitor the progress of migration in the View Results screen.
1. Review Migration Results
a. Select Export report to save the migration results to a .csv or .json file.
b. Review the saved file for details about data and logins migration and verify successful completion of the process.
Data sync and Cutover
For minimal-downtime migrations, the source you are migrating continues to change after the one-time migration occurs, and it will drift from the target in terms of data and schema. During this phase, you need to ensure that all changes in the source are captured and applied to the target in near real time. After you verify that all changes in source have been applied to the target, you can cutover from the source to the target environment.
Support for minimal-downtime migrations is not yet available for this scenario, so the Data sync and Cutover phases are not currently applicable.
Post-migration
After you have successfully completed the Migration stage, you need to go through a series of post-migration tasks to ensure that everything is functioning as smoothly and efficiently as possible.
Remediate applications
After the data is migrated to the target environment, all the applications that formerly consumed the source need to start consuming the target. Accomplishing this will in some cases require changes to the applications.
Perform tests
After the data is migrated to target, perform tests against the databases to verify that the applications perform well against the after the migration. Use the Database Experimentation Assistant (DEA) to assist with evaluating the target SQL Server on Azure VM environment.
Note: For assistance with developing and running post-migration validation tests, also consider using the Data Quality Solution available from the partner QuerySurge.
Steps
To use DEA for database migration testing, perform the following steps.
1. Run a trace capture.
a. On the left navigation tree, select the camera icon the go to All Captures.
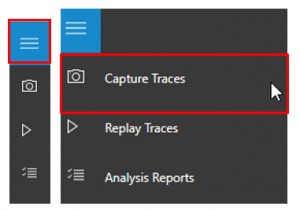
b. To start a new capture, select New Capture.
c. To configure the capture, specify the trace name, duration, SQL Server instance name, database name, and the share location for storing the trace file on the computer running SQL Server.
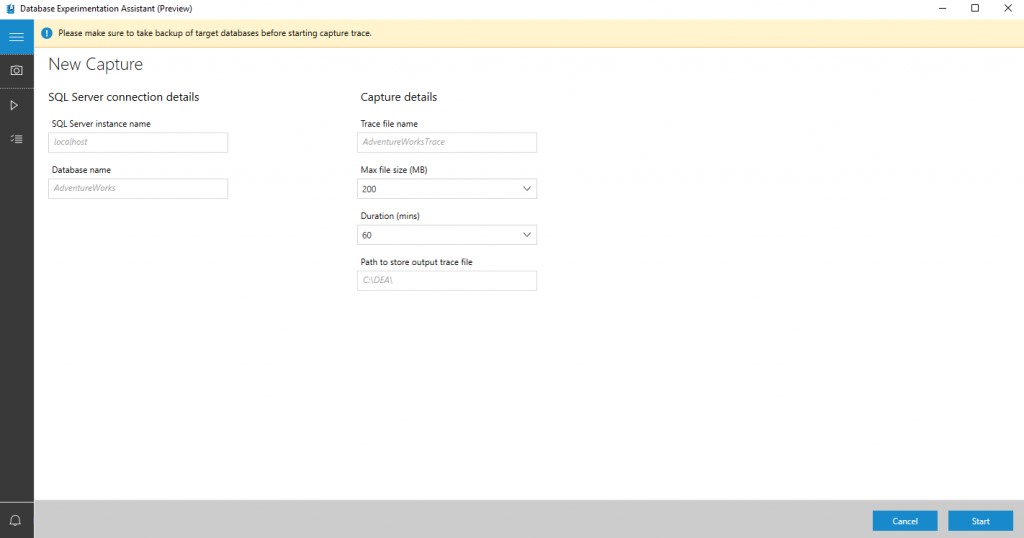
d. Select Start to begin trace capture.
2. Run a trace replay.
a. On the left navigation tree, select the play icon the go to All Replays.
b. To start a new replay, select New Replay.
c. To configure the replay, specify the replay name, controller machine name, path to source trace file on controller, SQL Server instance name, and the path for storing the target trace file on the computer running SQL Server.
d. Select Start to begin replay of your capture.
3. Create an analysis report.
a. On the left navigation tree, select the checklist icon to go to Analysis Reports.
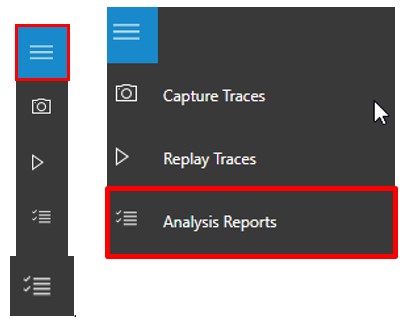
b. Connect to the SQL Server on which you will store your report databases.
You will see the list of all reports in the server.
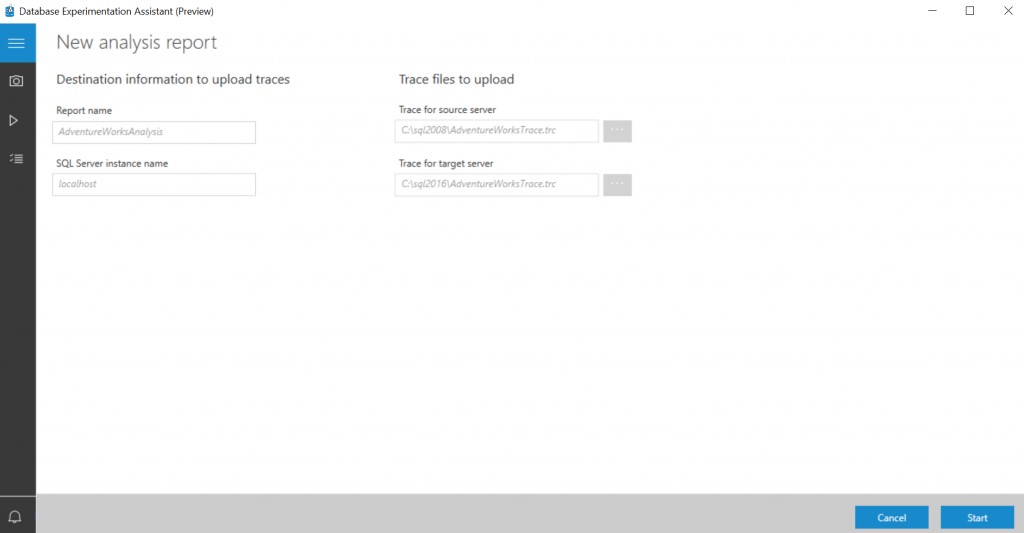
c. Select New Report.
d. To configure the report, specify the report name, and specify paths to the traces for the source and target SQL Server instances.
4. Review the analysis report.
a. On the first page of the report, the version and build information for the target servers on which the experiment was run displays.
Threshold allows you to adjust the sensitivity or tolerance of your A/B Test analysis.

b. Select the individual slices of the pie chart to view drill-down metrics on performance.

On the drill-down page for a performance change category, you will see a list of queries in that category.
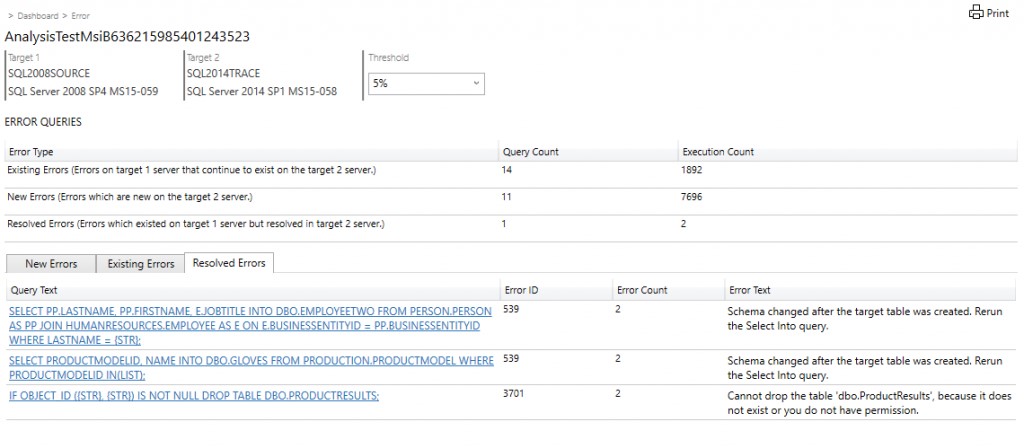
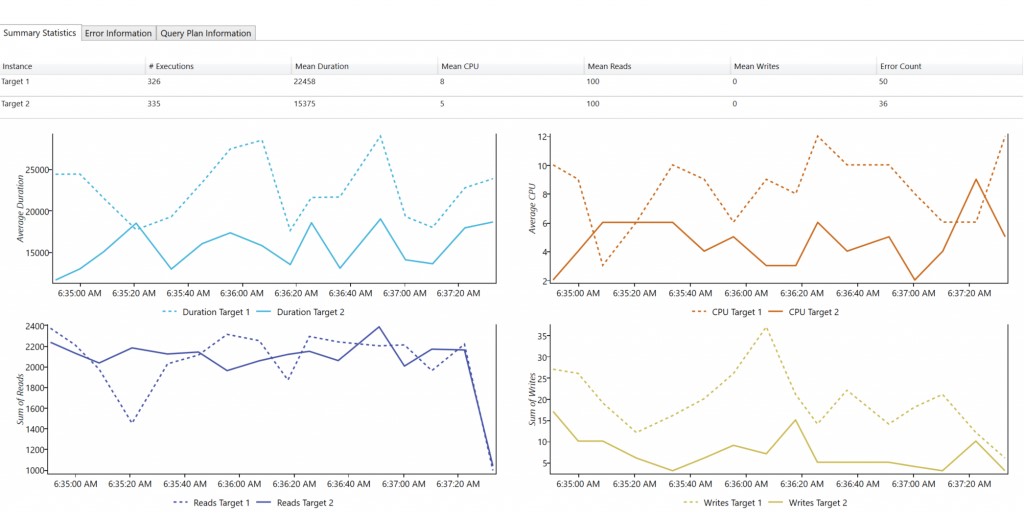
c. Select an individual query to get performance summary statistics, error information, and query plan information.
Optimize
The post-migration phase is crucial for reconciling any data accuracy issues and verifying completeness, as well as addressing performance issues with the workload.

